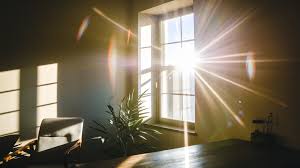
photeeq lens flare Photography is an art form that thrives on the careful manipulation of light. While photographers have always been conscious of how light influences their images, in recent years, the inclusion of lens flare as an effect has gained significant popularity. Lens flares—those natural streaks or circles of light often seen in a photograph when the light source hits the lens at an angle—can add dramatic flair to a photo. When used creatively, lens flare can evoke mood, drama, and creativity, transforming an ordinary image into something extraordinary.
Enter Photeeq Lens Flare, a powerful tool that allows photographers to apply stunning lens flare effects to their images, adding the perfect touch of light and atmosphere. Whether you’re working on a portrait, landscape, or even product photography, Photeeq Lens Flare can bring a unique dimension to your photos. In this article, we’ll delve into what Photeeq Lens Flare is, how to use it, tips for perfecting it, and how to get creative with this tool to enhance your images.
What is Photeeq Lens Flare?
Photeeq Lens Flare is a digital effect that mimics the natural phenomenon of lens flare in photography. Traditionally, lens flares occurred accidentally when light sources, such as the sun or streetlights, hit the lens at specific angles, creating visible reflections, halos, or streaks of light across the image. These unintended effects were sometimes avoided by photographers, but over time, they’ve become a creative tool used to evoke a sense of nostalgia, drama, or warmth.
The Photeeq Lens Flare tool is designed to replicate this effect intentionally in a digital setting, allowing photographers to enhance their images by adding dramatic light streaks or glares. Unlike physical lens flares, which can only occur in certain lighting conditions, Photeeq Lens Flare allows photographers full control over when and how they appear. It offers different types of lens flare effects, from subtle glares to more intense streaks, and can be adjusted to suit various styles and preferences.
One of the key benefits of Photeeq Lens Flare is that it’s versatile and easy to use. Unlike traditional methods that involve manipulating physical lighting or equipment to induce lens flare, Photeeq enables photographers to add a lens flare effect to any image post-production. This flexibility makes it accessible for both beginners and professionals. Whether you want to give your photo a cinematic quality or a soft, dreamy glow, Photeeq Lens Flare helps you achieve your vision effortlessly.
How to Use Photeeq Lens Flare in Photography
Using Photeeq Lens Flare is straightforward, even for those new to photo editing. The first step is selecting the image you want to enhance. Whether you’re using Photeeq within a standalone application or as a plugin for popular photo-editing software like Adobe Photoshop or Lightroom, the process remains relatively the same. Once you’ve imported your photo into the editing software, you can add the lens flare effect.
In Photeeq, you’ll find a variety of flare options, such as lens glares, halo effects, and streaking light rays. To apply these effects, simply drag and drop the flare effect onto your image. From here, you can adjust the size, intensity, and position of the flare to achieve the desired result. One of the standout features of Photeeq is the ability to control the flare’s direction. By adjusting the angle, you can ensure the flare flows naturally from the light source, whether it’s the sun, a lamp, or a streetlight.
In addition to position and intensity, Photeeq offers customization options that let you tweak the color of the lens flare. You can opt for warm tones, such as golden yellows and oranges, or cooler shades of blue and purple to match the mood of your photo. This control over the color palette allows for a more cohesive image, ensuring that the flare blends seamlessly with the rest of the composition.
For beginners, it’s recommended to start with subtle flare effects. Gradually increasing the intensity as you become more comfortable with the tool will help you understand how it interacts with different images. Photeeq provides both a preview mode and zoom options, so you can make precise adjustments without guessing how the final product will look. Once you’ve perfected your flare, you can apply it and save your work.
Tips and Techniques for Perfecting Lens Flare Effects
While Photeeq Lens Flare is a powerful tool, it’s essential to use it with care. Overusing lens flare can result in images that feel cluttered or artificially enhanced, so moderation is key. Here are some expert tips for using Photeeq Lens Flare effectively:
Subtlety is Key
Subtle lens flare effects often have the most impact. For instance, a small but well-placed flare can elevate a sunset image by highlighting the light coming through trees or buildings. By keeping the flare relatively subtle, it complements the natural lighting of the image rather than overwhelming it. Start with a lower intensity and gradually adjust it to create a balanced look.
Use Flares to Guide the Viewer’s Eye
Lens flares aren’t just for decoration—they can be used as tools to direct the viewer’s focus. In portrait photography, you can use the flare to subtly highlight the subject’s face or other important elements of the composition. In landscape photography, a flare placed near the horizon can guide the viewer’s attention towards the setting sun or rising light, creating a visual path for the eye to follow.
Consider Your Image’s Lighting
Not all images benefit from lens flare, so be mindful of the lighting in your photo. Lens flare works best when it aligns with the natural light sources within the scene. For example, in a photo where the sun is peeking through trees, adding a flare to the image can simulate the light burst that would occur in real life. However, adding a flare to a photo without any natural light sources might look forced or unnatural.
Experiment with Different Styles of Flares
Photeeq Lens Flare offers different types of flare effects, from soft glows to sharp streaks. Experiment with different styles to see which one works best for your image. A soft glow can create a dreamy, ethereal effect, while sharper streaks might evoke a sense of urgency or movement. Don’t hesitate to combine different styles to add layers to your photo.
By following these tips, you can master the art of lens flare and incorporate it into your photography with finesse and precision.
Creative Applications of Photeeq Lens Flare
One of the most exciting aspects of Photeeq Lens Flare is its versatility across different genres of photography. Whether you’re shooting portraits, landscapes, or even product photography, lens flare can add an artistic touch to your images. Here’s how you can use Photeeq Lens Flare in various contexts:
Landscape Photography
In landscape photography, lens flare can add a magical quality to your photos, particularly in sunrise or sunset shots. The addition of flare effects can emphasize the direction of the sunlight, creating a glowing horizon or enhancing the natural light bouncing off the landscape. The tool’s ability to adjust color and intensity makes it easy to match the flare with the warm or cool tones of the environment.
Portrait Photography
When used in portraits, lens flare can add an emotional or cinematic feel. A flare positioned behind the subject can create a halo effect, enhancing the subject’s features and adding a sense of depth. It’s particularly effective in outdoor settings, such as beach shoots or golden hour portraits, where natural light can be enhanced with the digital flare to create a more striking effect.
Product Photography
In product photography, lens flare can be used strategically to highlight key features of the product or enhance its presentation. For instance, in jewelry photography, a lens flare can draw attention to the sparkle of diamonds or metal, adding a luxurious feel to the image. Similarly, in food photography, a subtle flare can bring out the colors and textures of the dish, creating an inviting, appetizing look.
Fashion Photography
Fashion photographers often use lens flare to create an editorial, high-fashion look. The dramatic light effects can add a sense of glamour or mystery, which is ideal for campaigns and editorial work. The ability to adjust the direction and intensity of the flare gives photographers the flexibility to achieve a wide range of styles, from minimalist to bold and daring.
Cinematic Photography
Lens flare is often used in cinematic photography to evoke the feel of a movie scene. Filmmakers and photographers alike use this effect to mimic the look of popular movies, creating a sense of nostalgia or drama. Photeeq Lens Flare can help you achieve that same cinematic look without the need for expensive equipment or complicated setups.
By applying Photeeq Lens Flare creatively across various genres of photography, you can bring a fresh perspective to your work and open up new artistic possibilities
Conclusion
In the world of photography, light is one of the most important elements that can make or break an image. Photeeq Lens Flare offers photographers a creative tool to enhance their photos by adding beautifully controlled light effects. Whether you’re looking to introduce a cinematic feel, create depth in portraits, or elevate your landscape photography, Photeeq Lens Flare gives you the flexibility and control to experiment with light in ways that were once only possible with physical lens flares.
By understanding how to use this tool effectively—keeping it subtle, guiding the viewer’s eye, and experimenting with different flare styles—you can achieve stunning results in your photography. With Photeeq Lens Flare, there’s no limit to how you can creatively manipulate light to tell your visual story.